

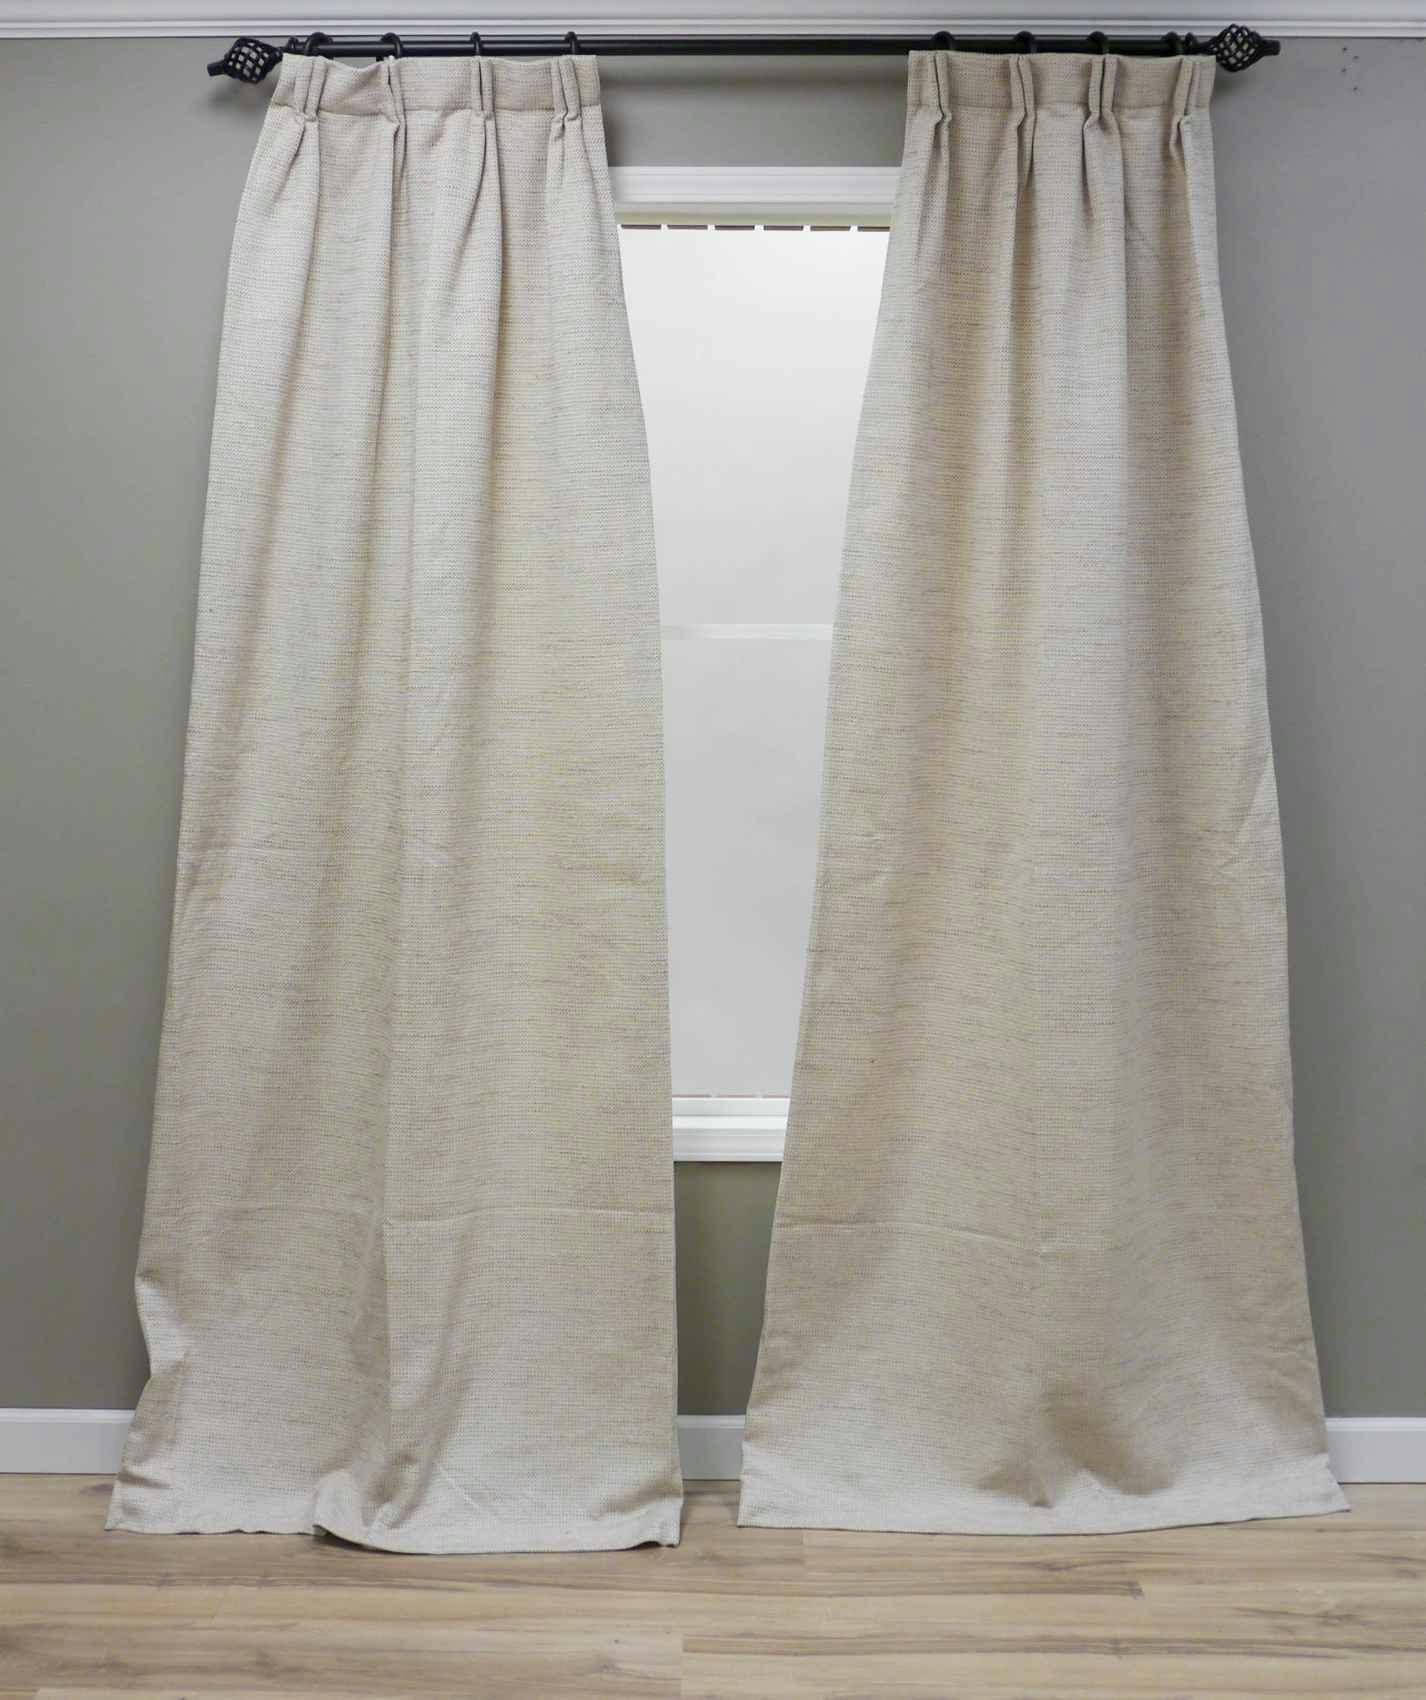
When hanging draperies, you can't expect them to look perfect right out of the package. It takes a few extra steps to give your windows a professional look, but it's so worth it.
How to Train Drapes
Getting Started: Iron or Steam to Remove Creases
Start by steaming or ironing your draperies to remove any creases. If you're steaming, you can leave your drapes hung to do this, but remove them from the rod if you're ironing. In either case, check the fabric content of your drapes first to see what temperature they can be ironed or steamed at. If in doubt, lay a clean towel over your drapery fabric and iron over the towel on low.
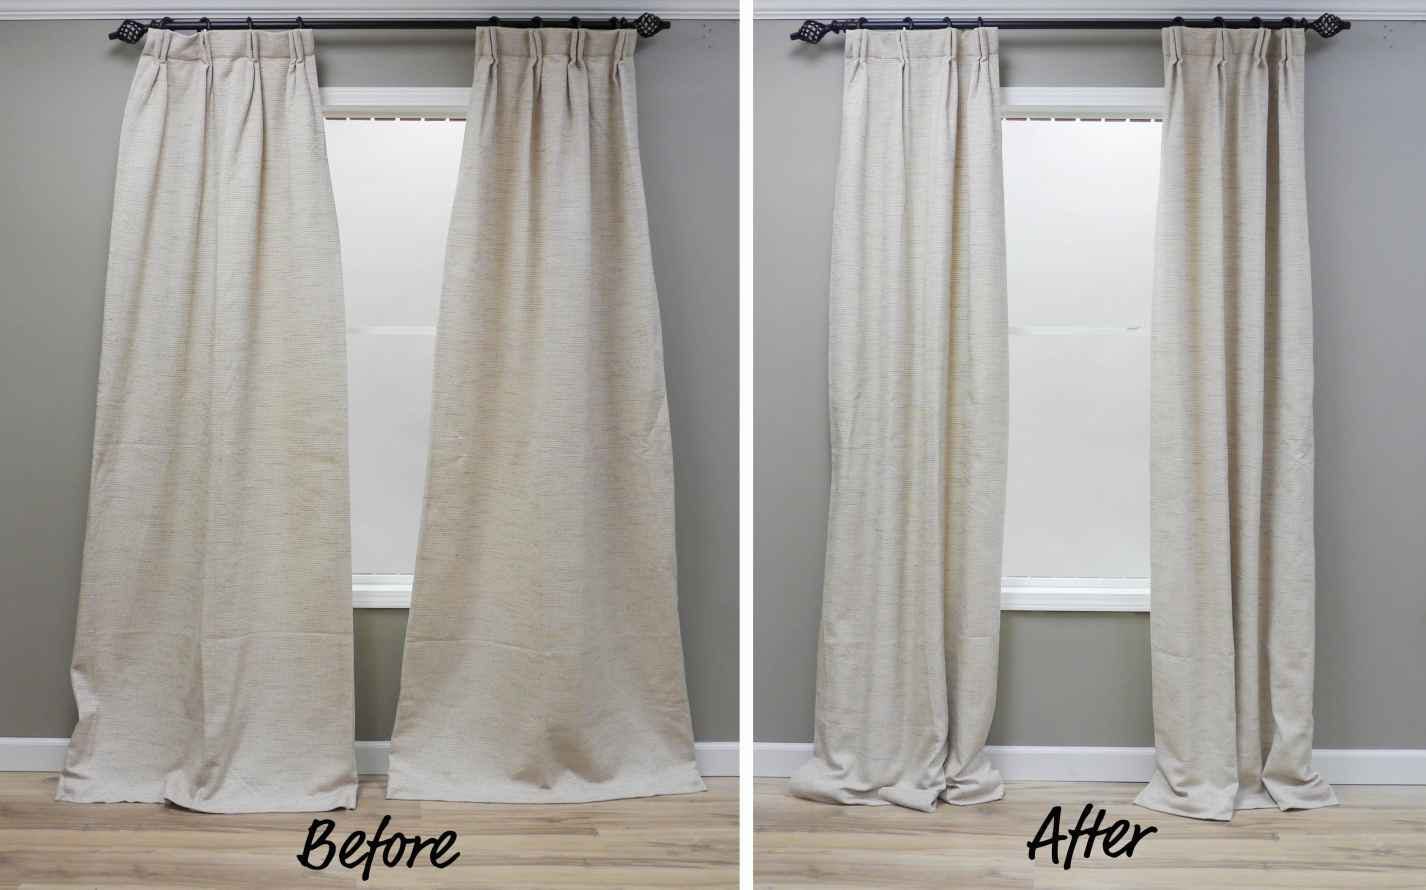
However, just ironing your curtains will cause your drapes to spread out at the bottom rather than hanging uniformly along with the built-in pleats. We can fix this with a process called training drapes. Here's how it's done.
How to Train Drapes
We'll be using pinch pleat drapes for our example today, but this process will work for the grommet, tab, and rod pocket styles.
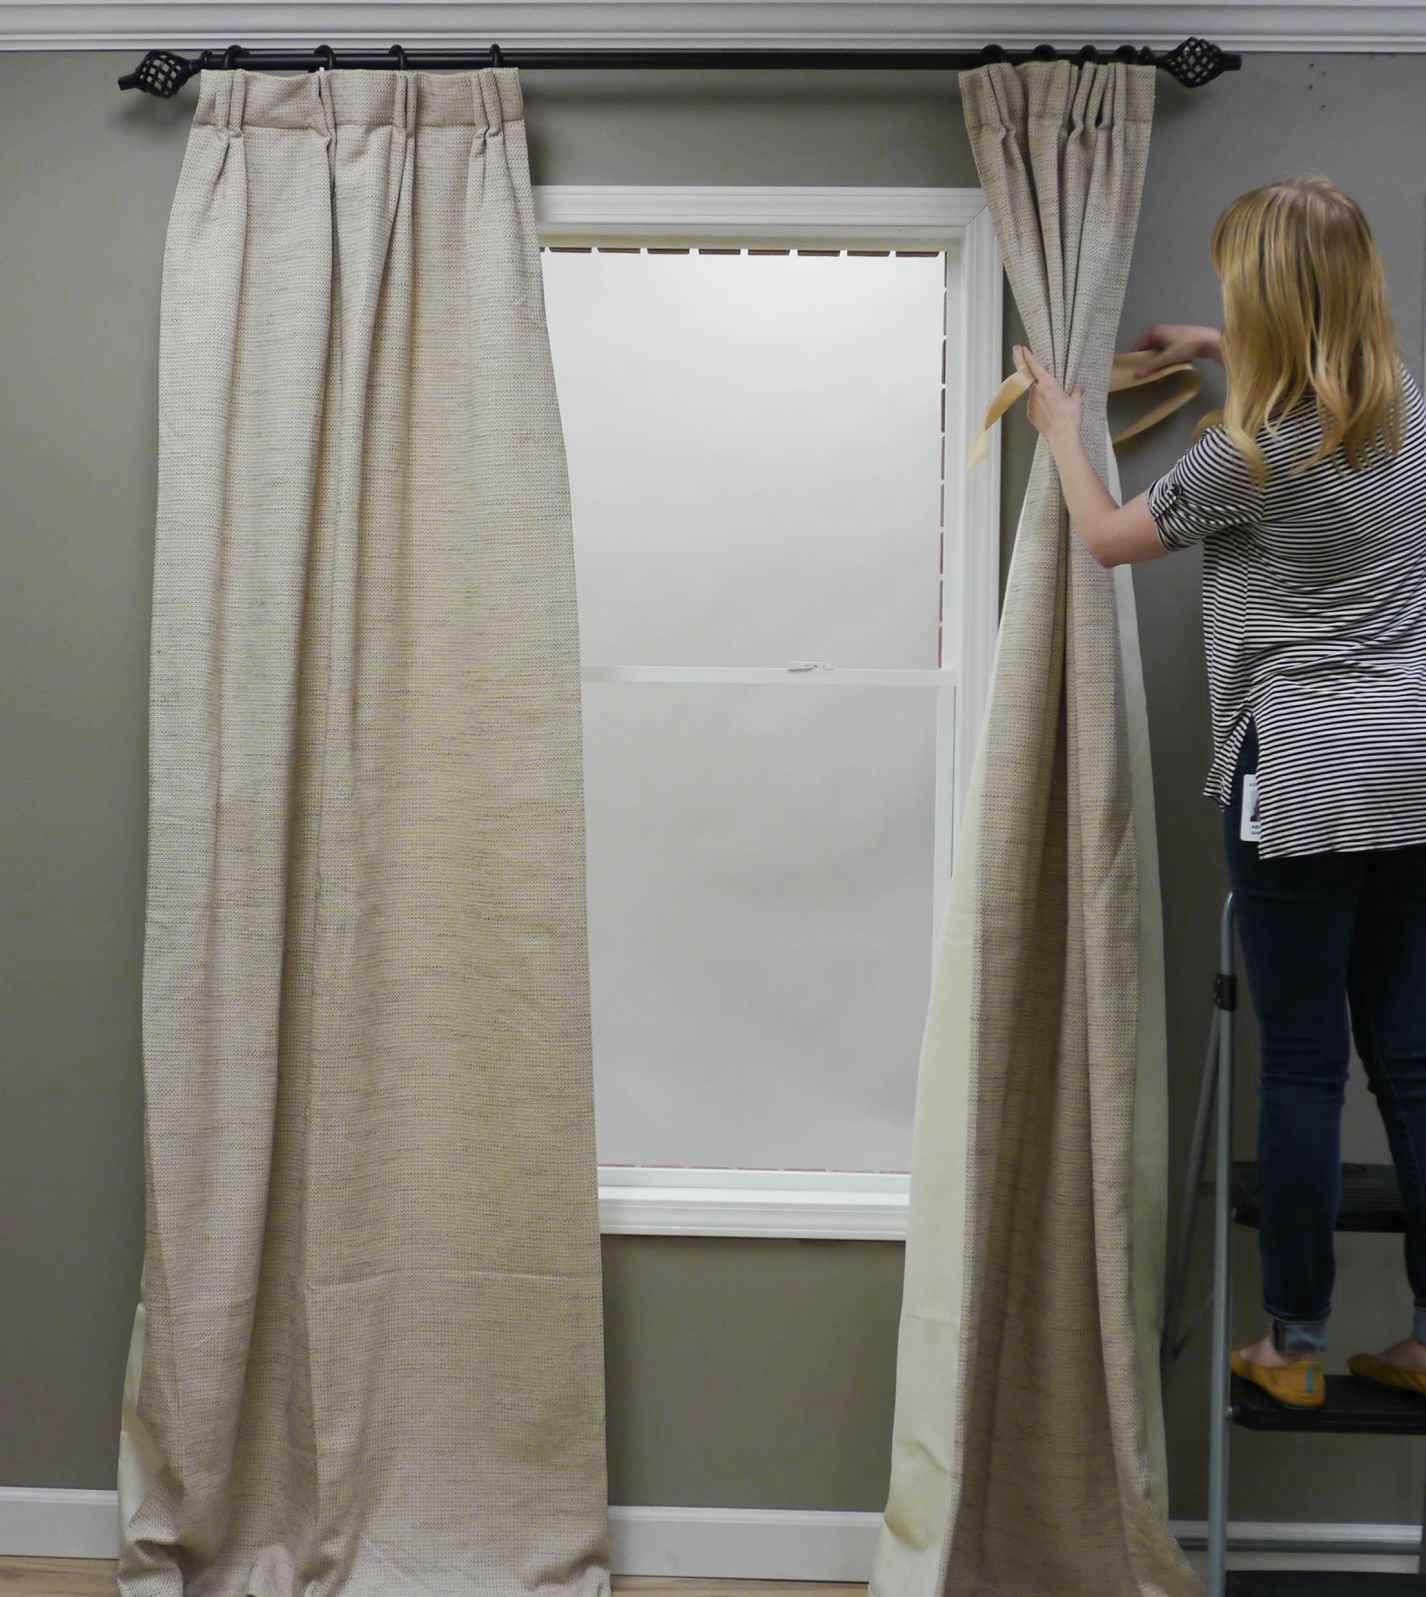
1. Begin by folding your drapes along the pleats at the top. If some folds won't stay in the right direction, don't worry, we'll correct that next.

2. See how several of these folds are turning out instead of back?
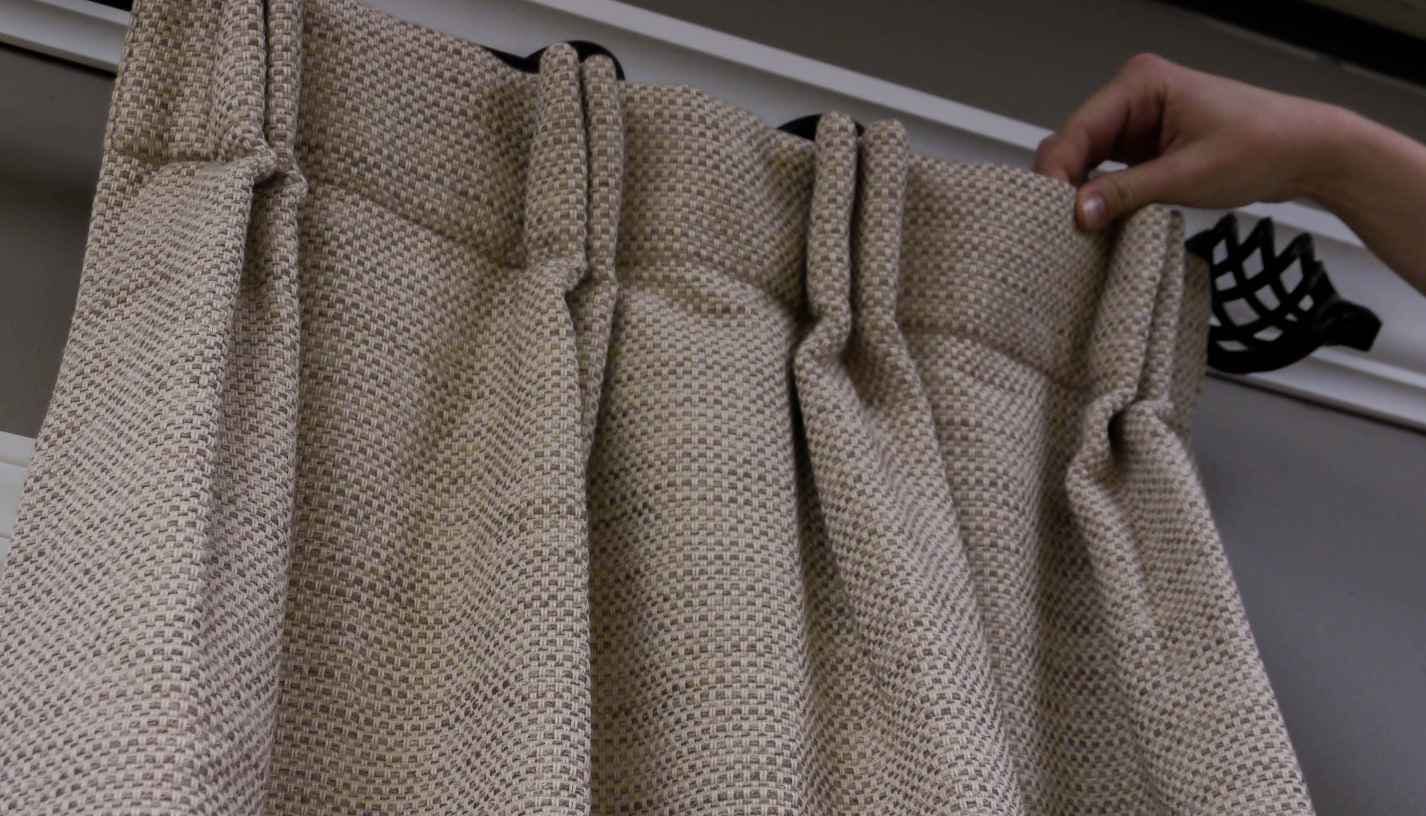
Force the pleat in the correct direction and bring the pinch pleats together.
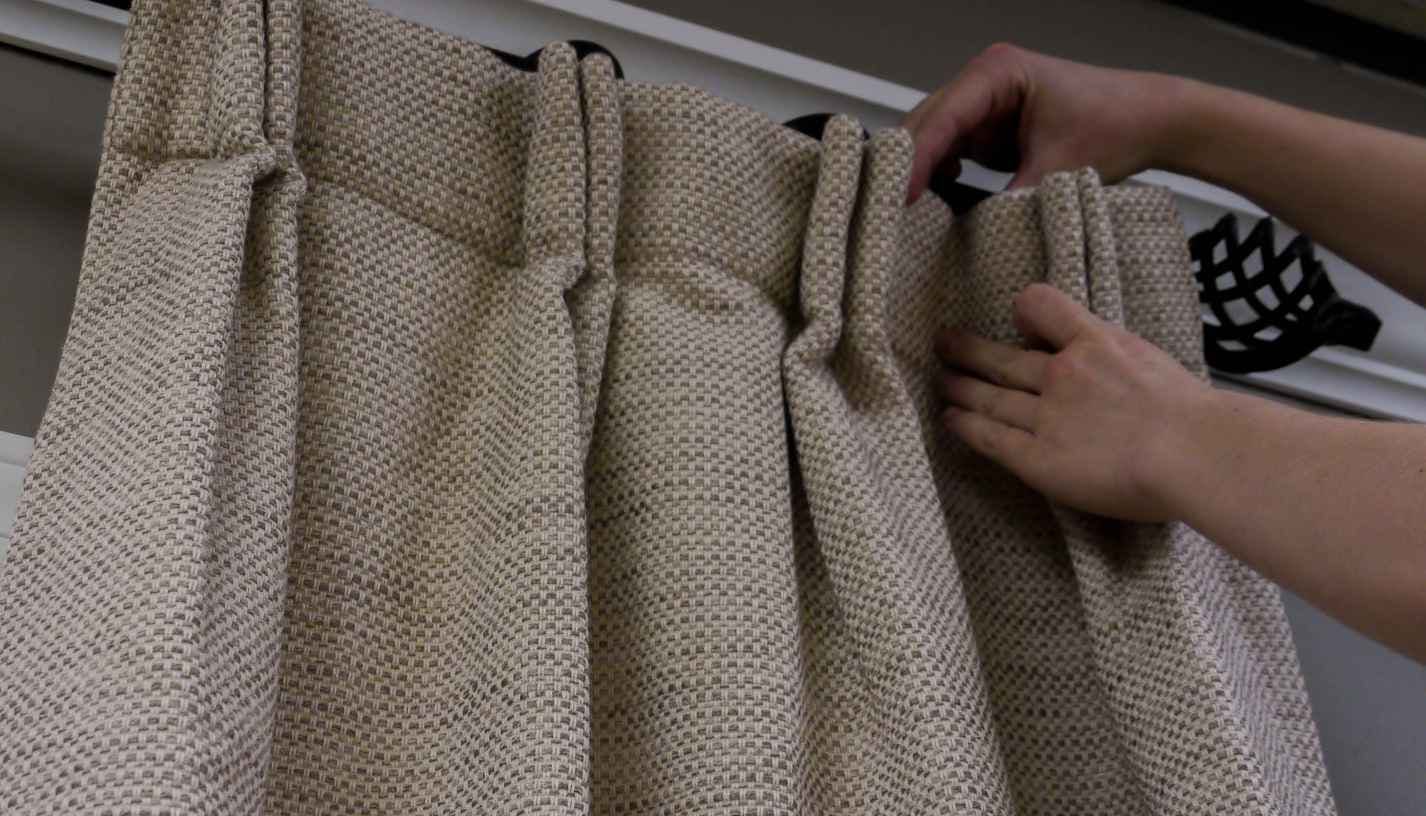
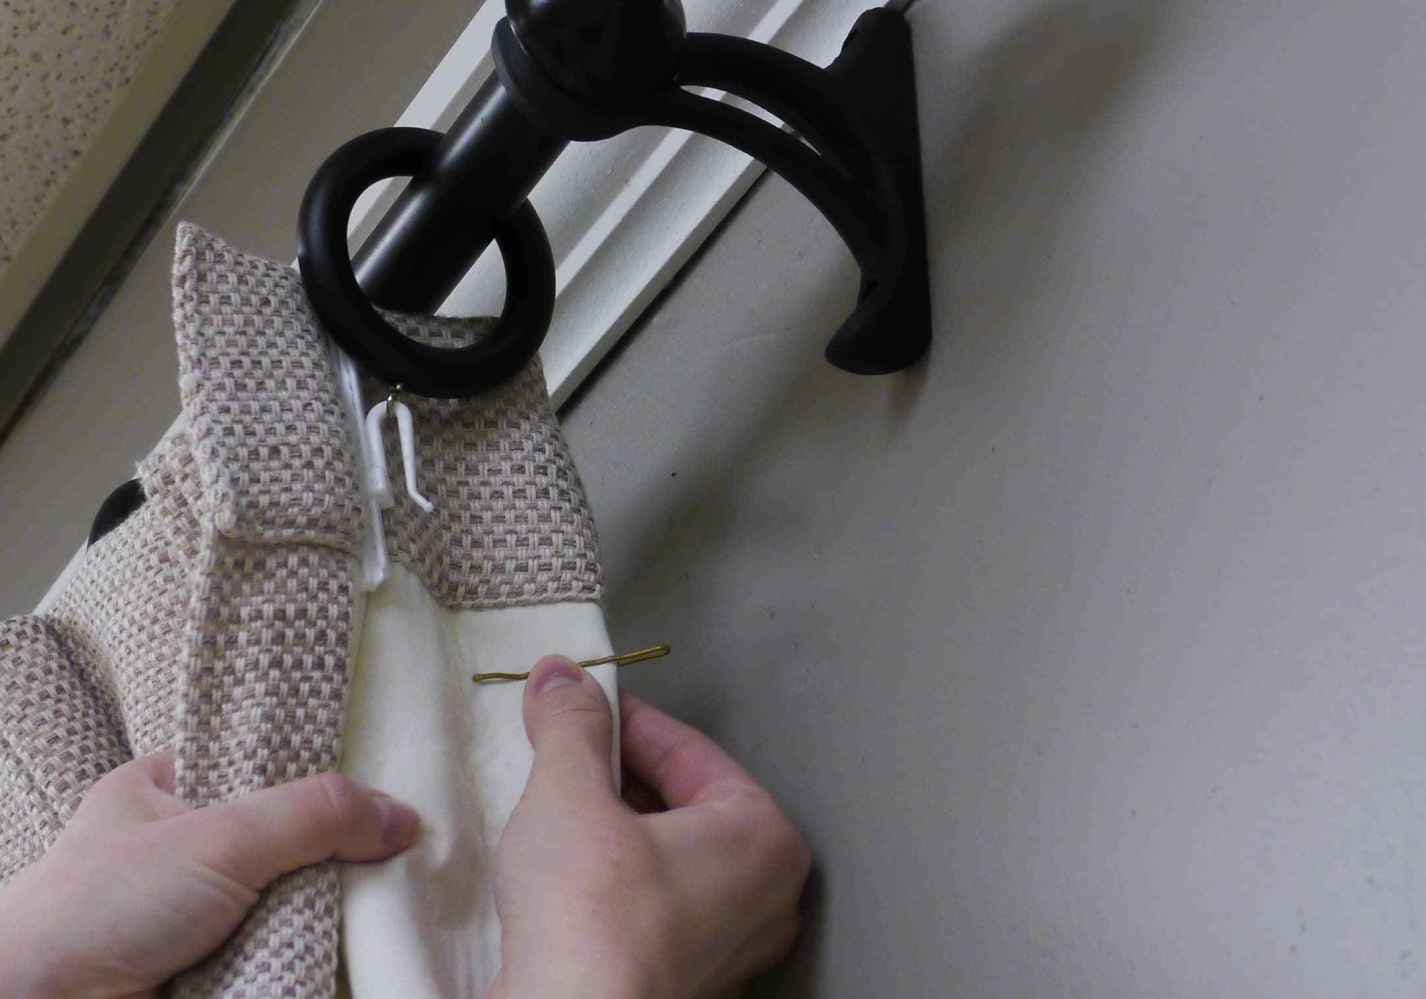
We'll keep the fold in place with a bobby pin or clothespin on the back of the fabric. Placing the pin on the back prevents a crease from showing on the front of the fabric. Repeat for all folds that won't stay in the right direction.
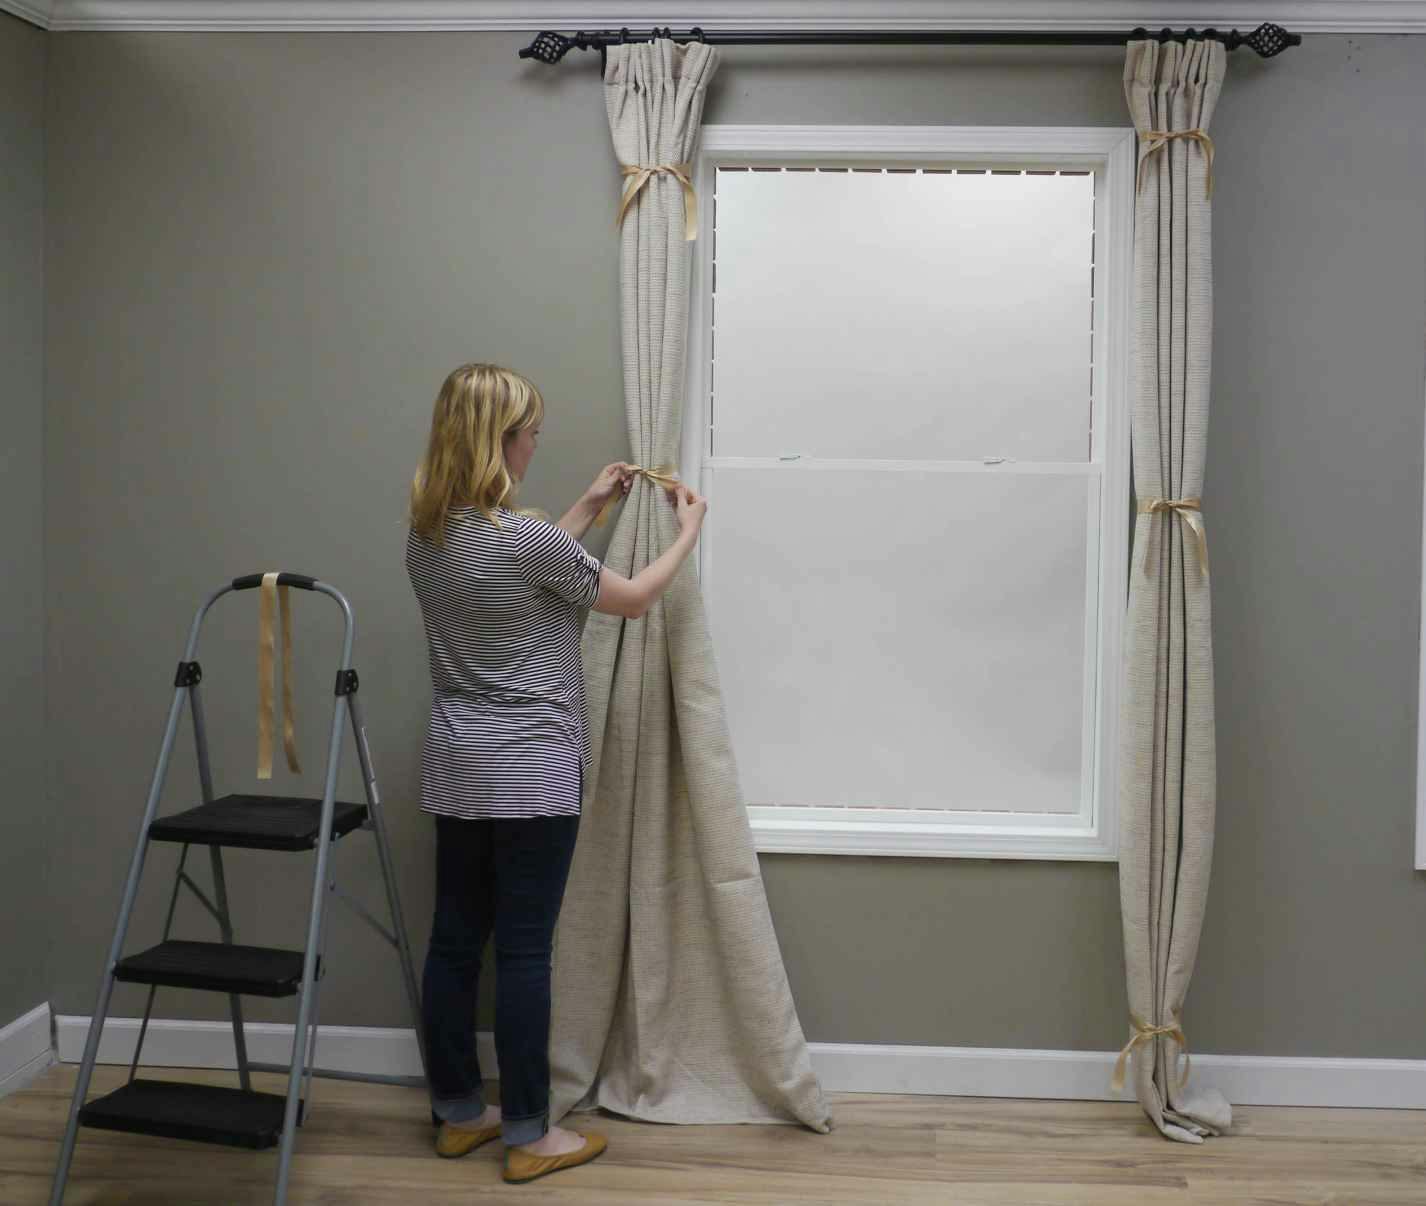
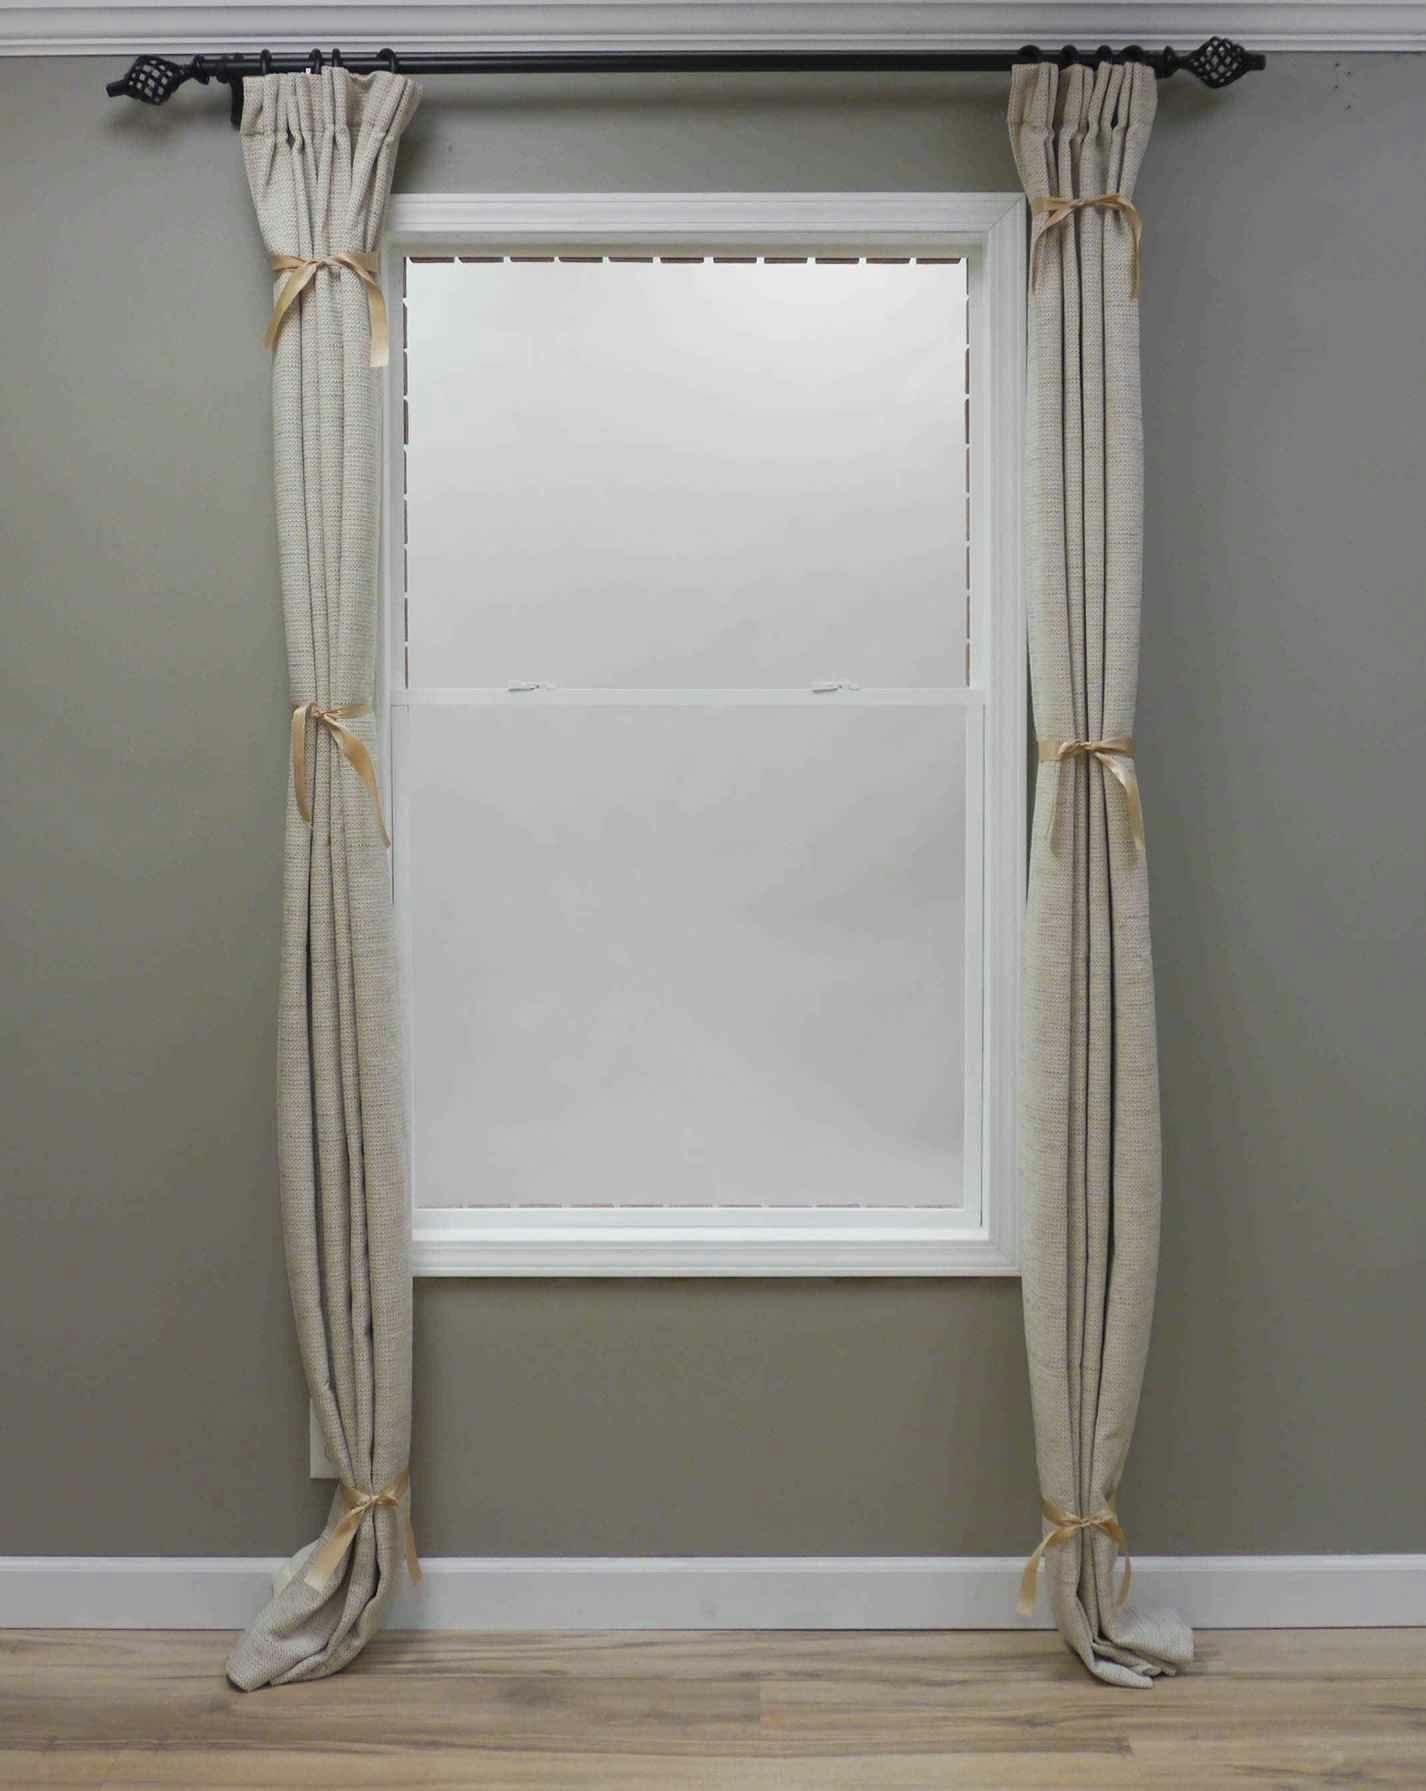
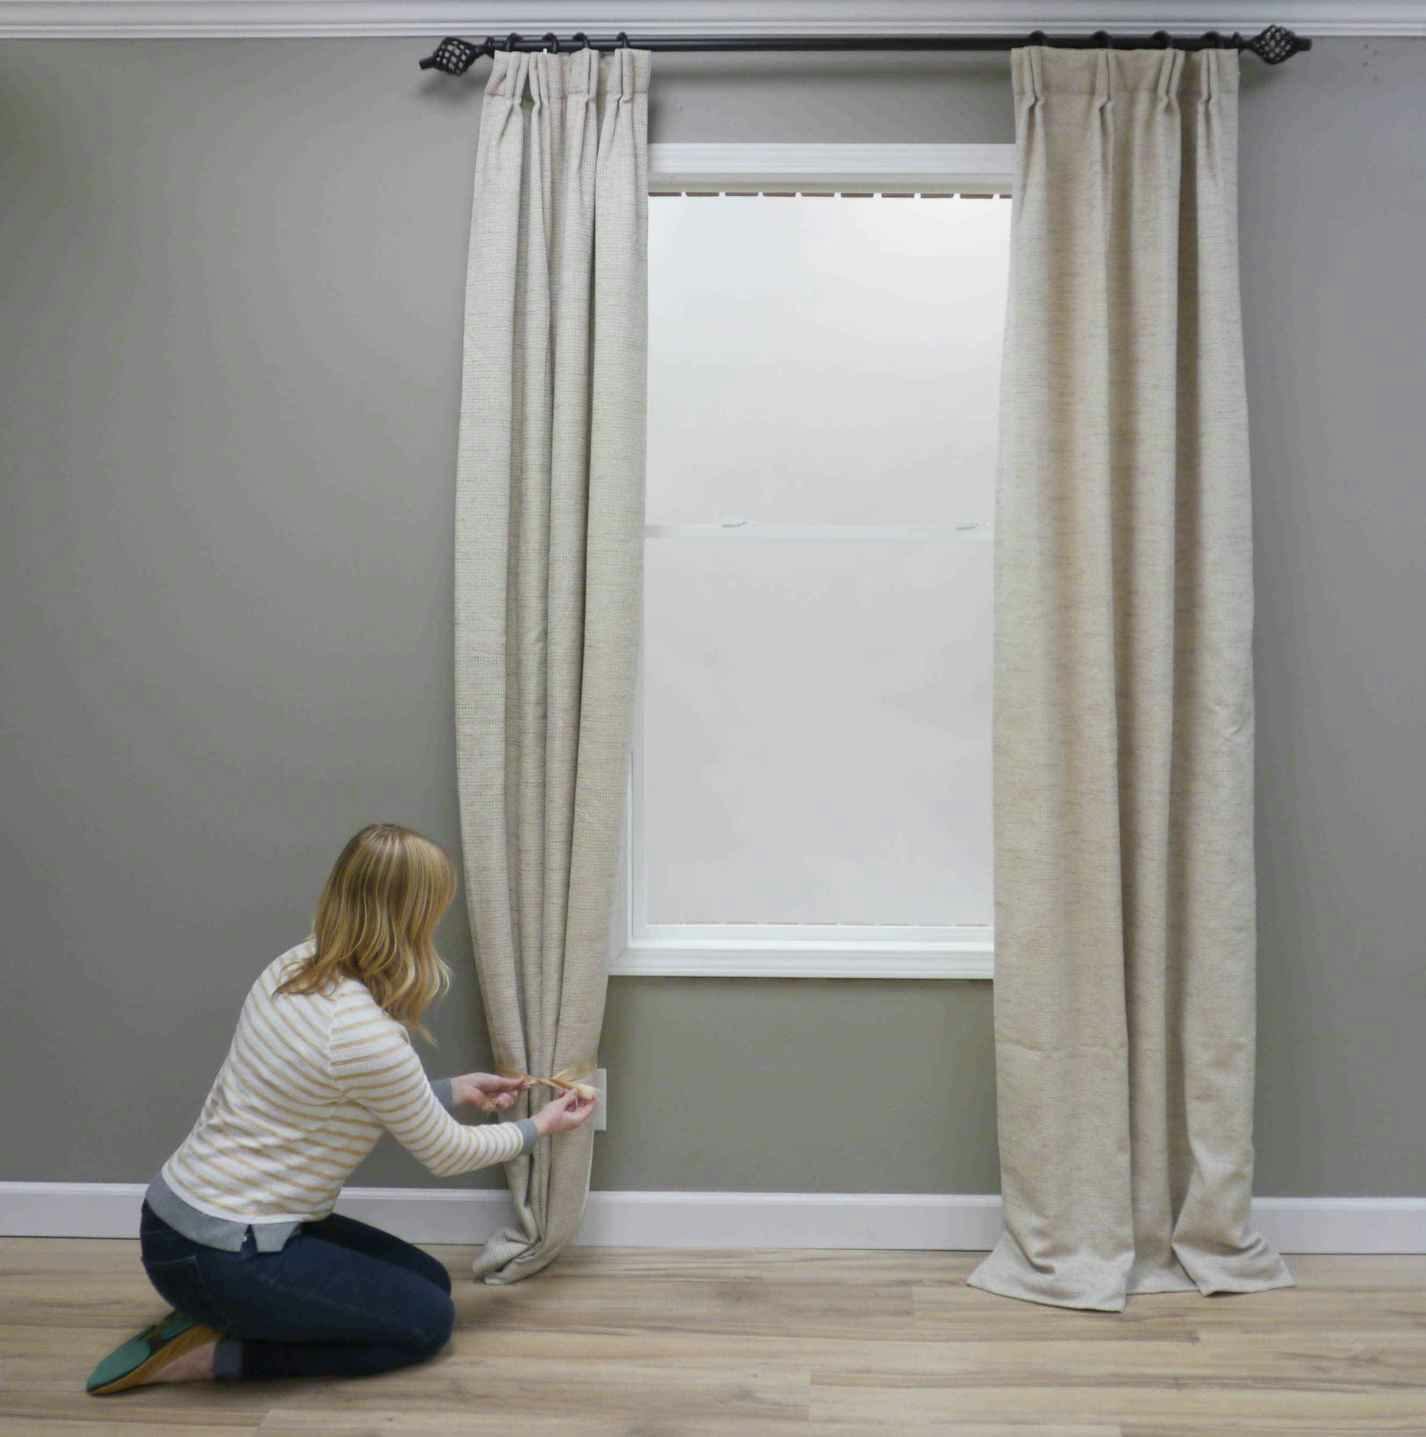
3. Refold your pleats and secure them with a ribbon or yarn. Tie fairly loosely. We want to hold the pleats in a snug stack, but not so tight that we crease the fabric.
4. Tie at the top, middle, and bottom of your drapes. Repeat for both sides.
5. Leave your drapes tied and allow them to "train" for 2 or 3 weeks. This may seem like a long time, but it's worth it to have drapes that hang perfectly for years to come.
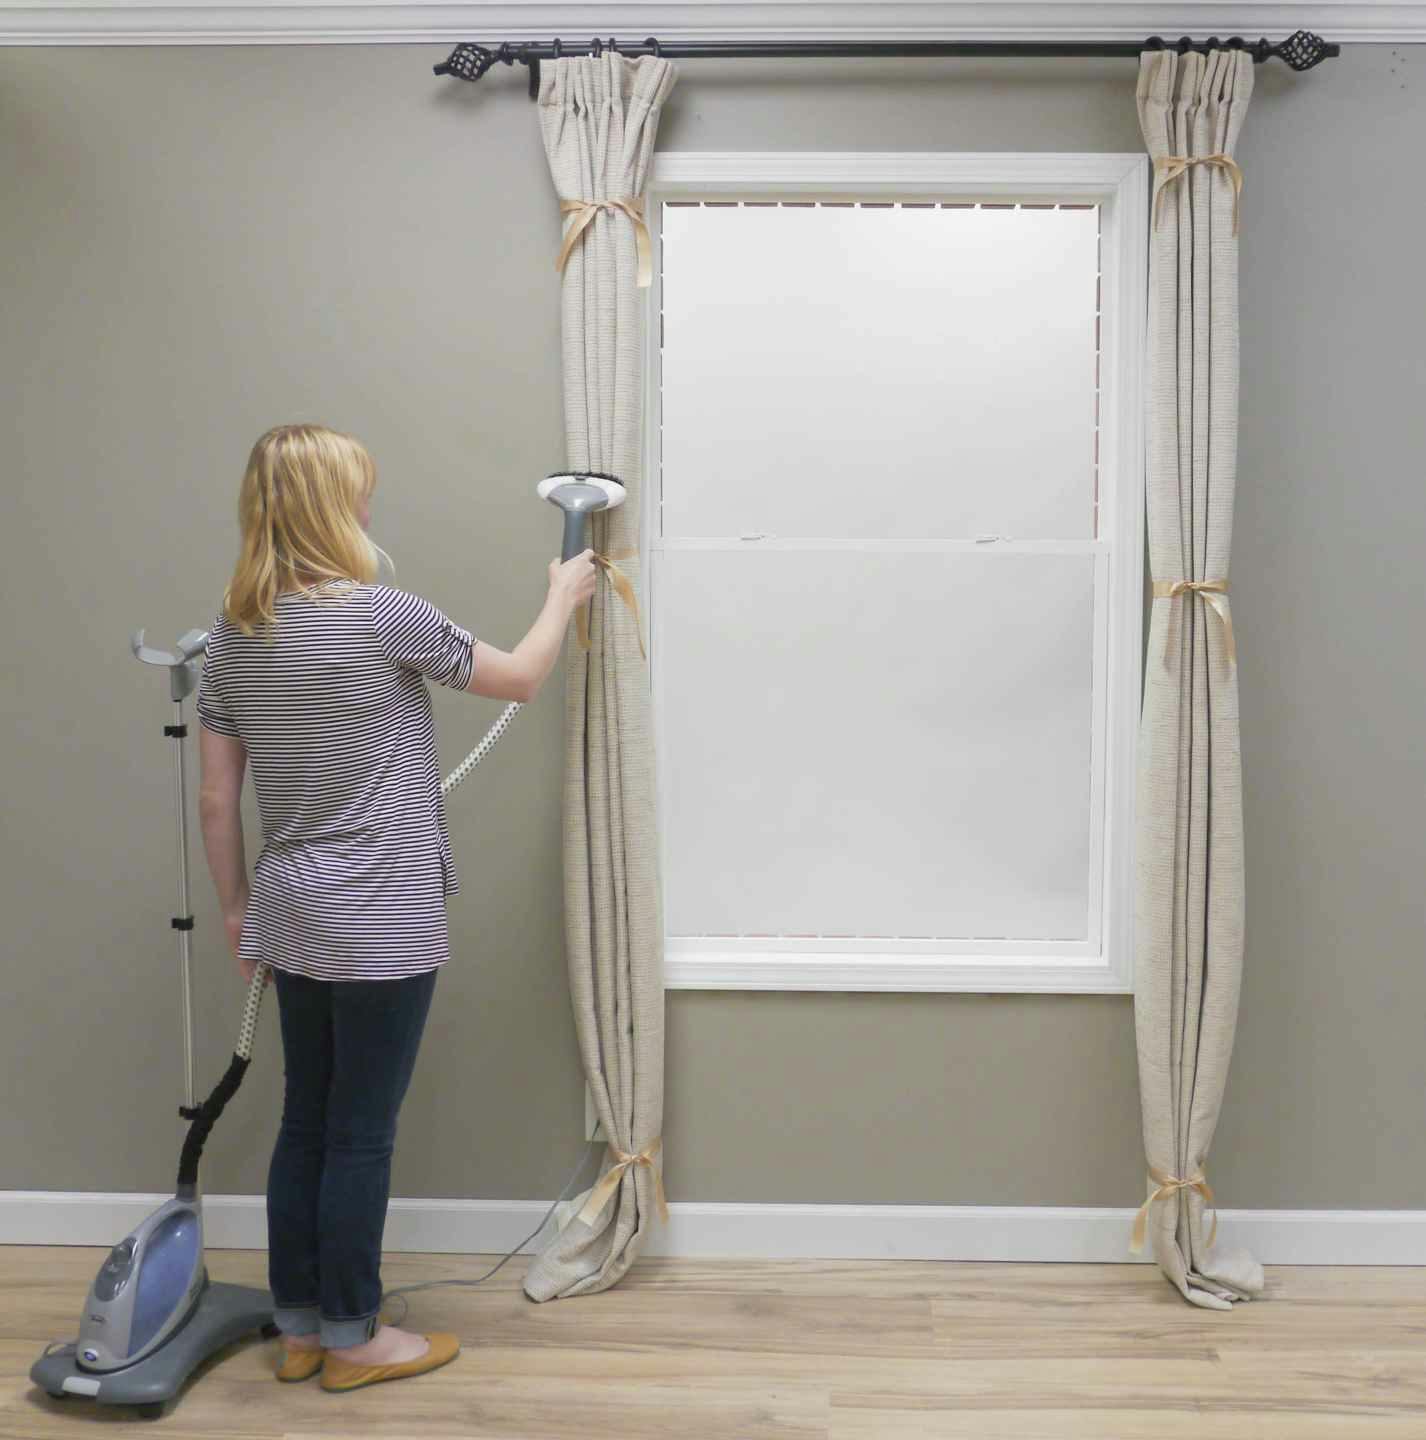
If you can't quite wait that long, you may be able to speed up the process by steaming your drapes while they're tied. After steaming, leave your drapes to train for 48 hours.
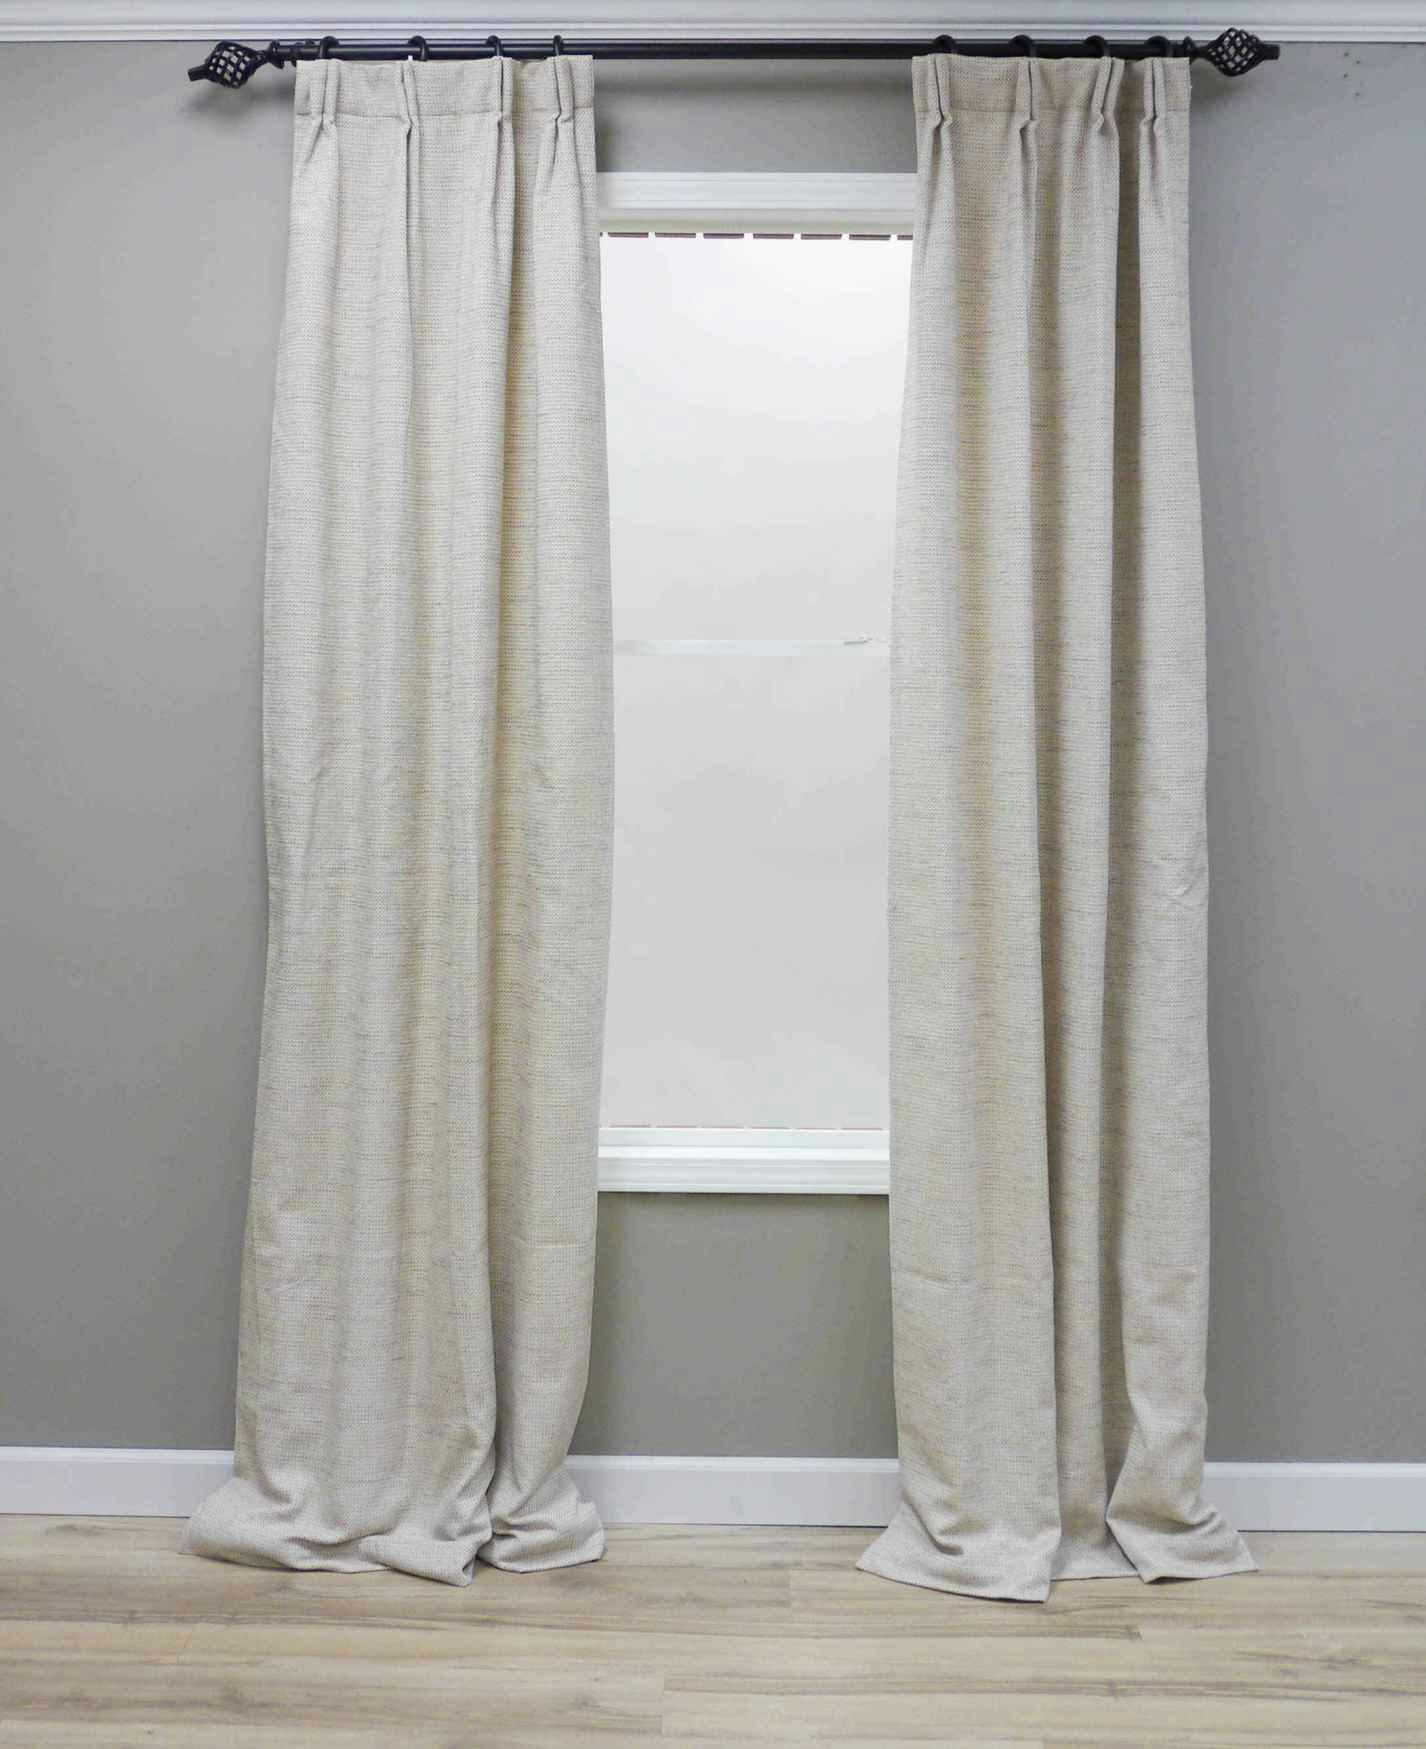
5. When you're done training, untie your drapes and spread them out.
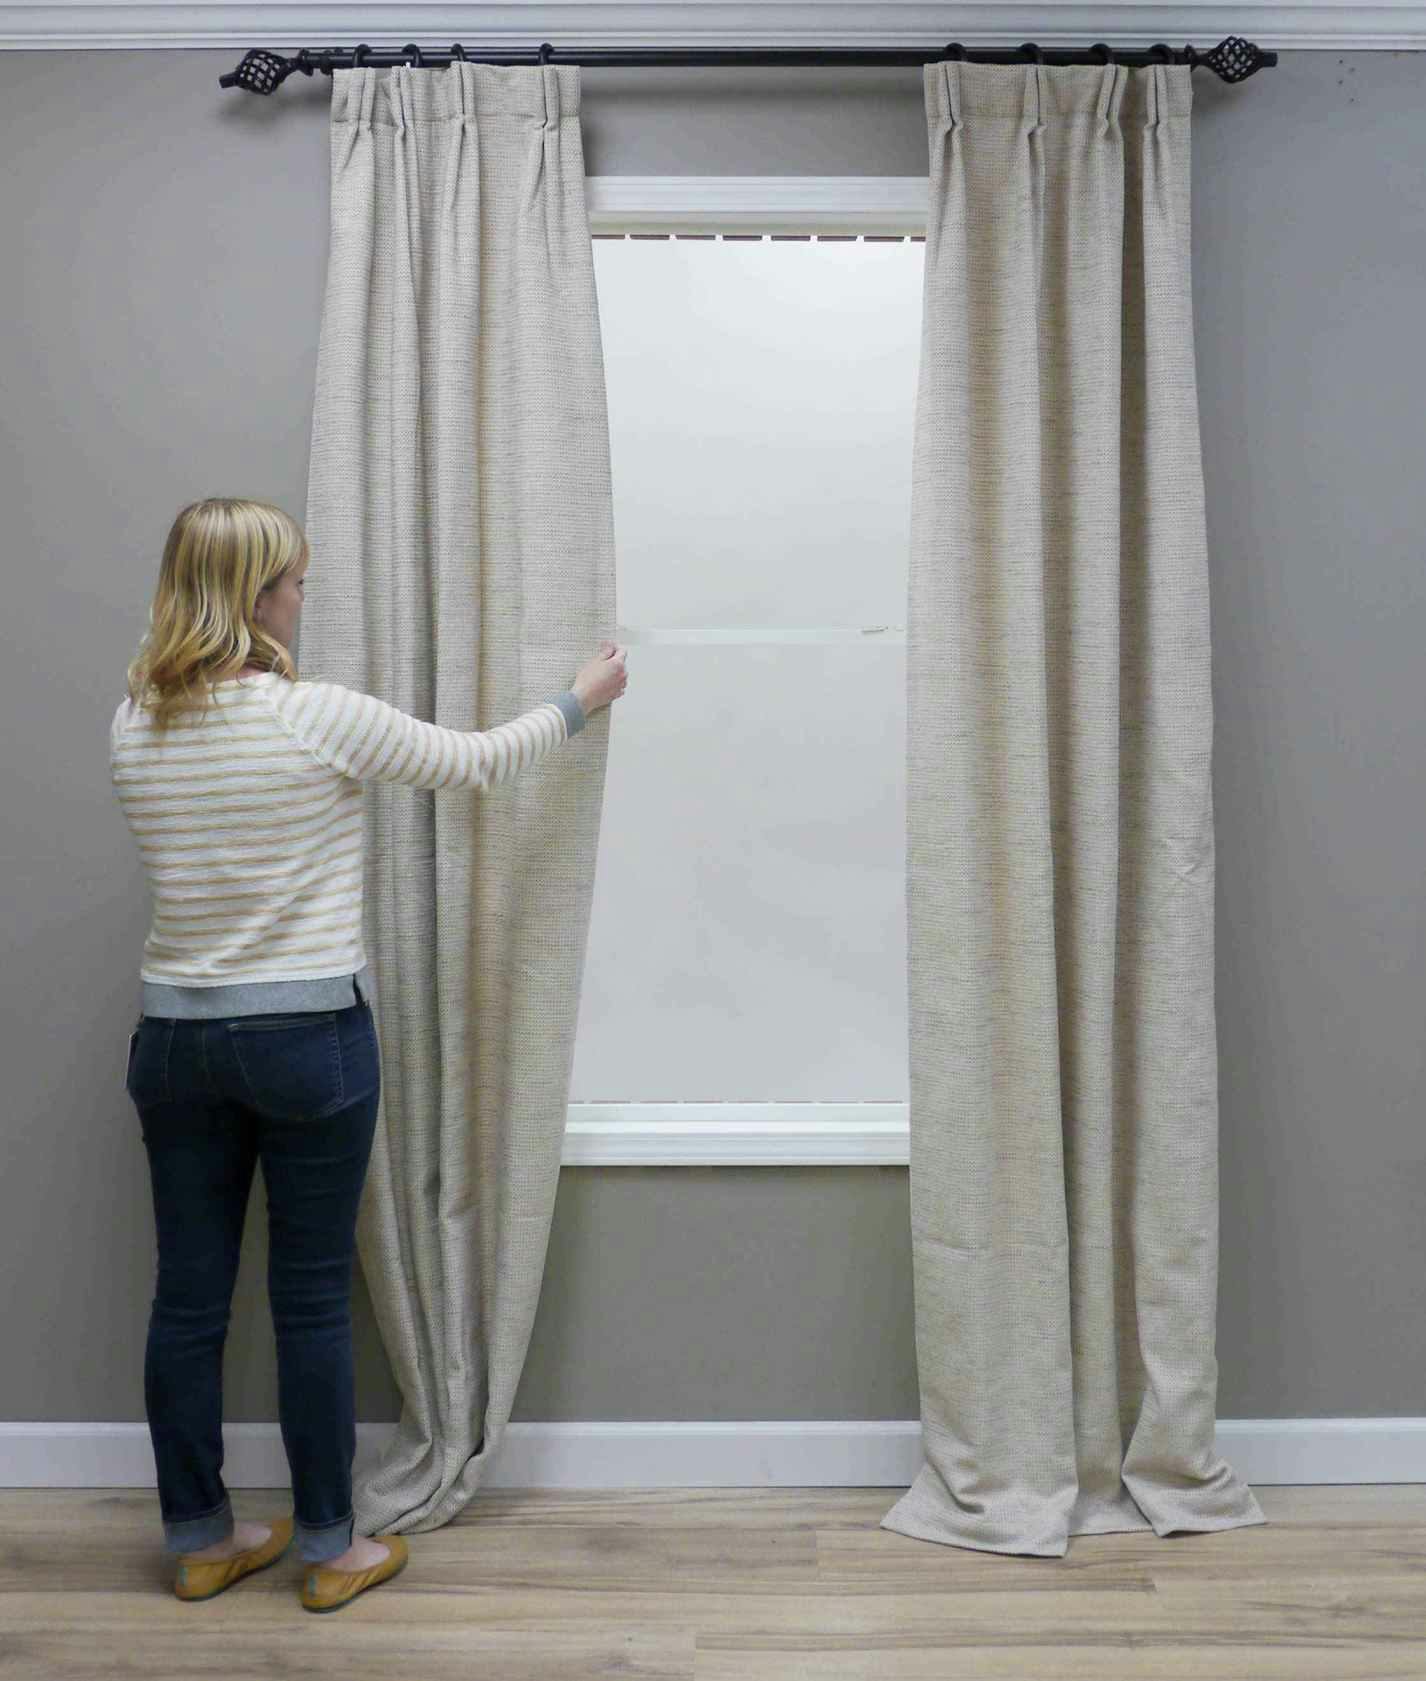
See how much better they look? Your drapes now hang straight and can be pulled back from the window in a neat stack. These drapes were ordered a bit longer for a puddled effect, but drapes that hover just above the floor will have an even more crisp and tailored look after they're trained.
Thanks to our friend Seng, who writes at Sengerson.com, for producing the video version of this tutorial and sharing the great technique with us. Be sure to check out these posts on Sengerson.com for more tips + window inspiration:
Tips for Hanging Curtains like a Designer
Kitchen Nook Reveal with Custom Color Shutters
Want to Order Custom Draperies and Curtains for your Home?
Blinds.com has 100s of fabrics and custom options to choose from, including stylish curtain rods. To get started, order free fabric samples, browse our styles, or speak to a Blinds.com designer at 800-505-1905. Learn more about how to measure for draperies.